Example Stone Veneer Projects in Round Rock

Here you can follow ten exterior stone jobs from choosing the stone to the last joint. Each one says who asked for what, which layers go on the wall first, the days on site and an approximate price.

Limestone on a new grill island and bar

Example project
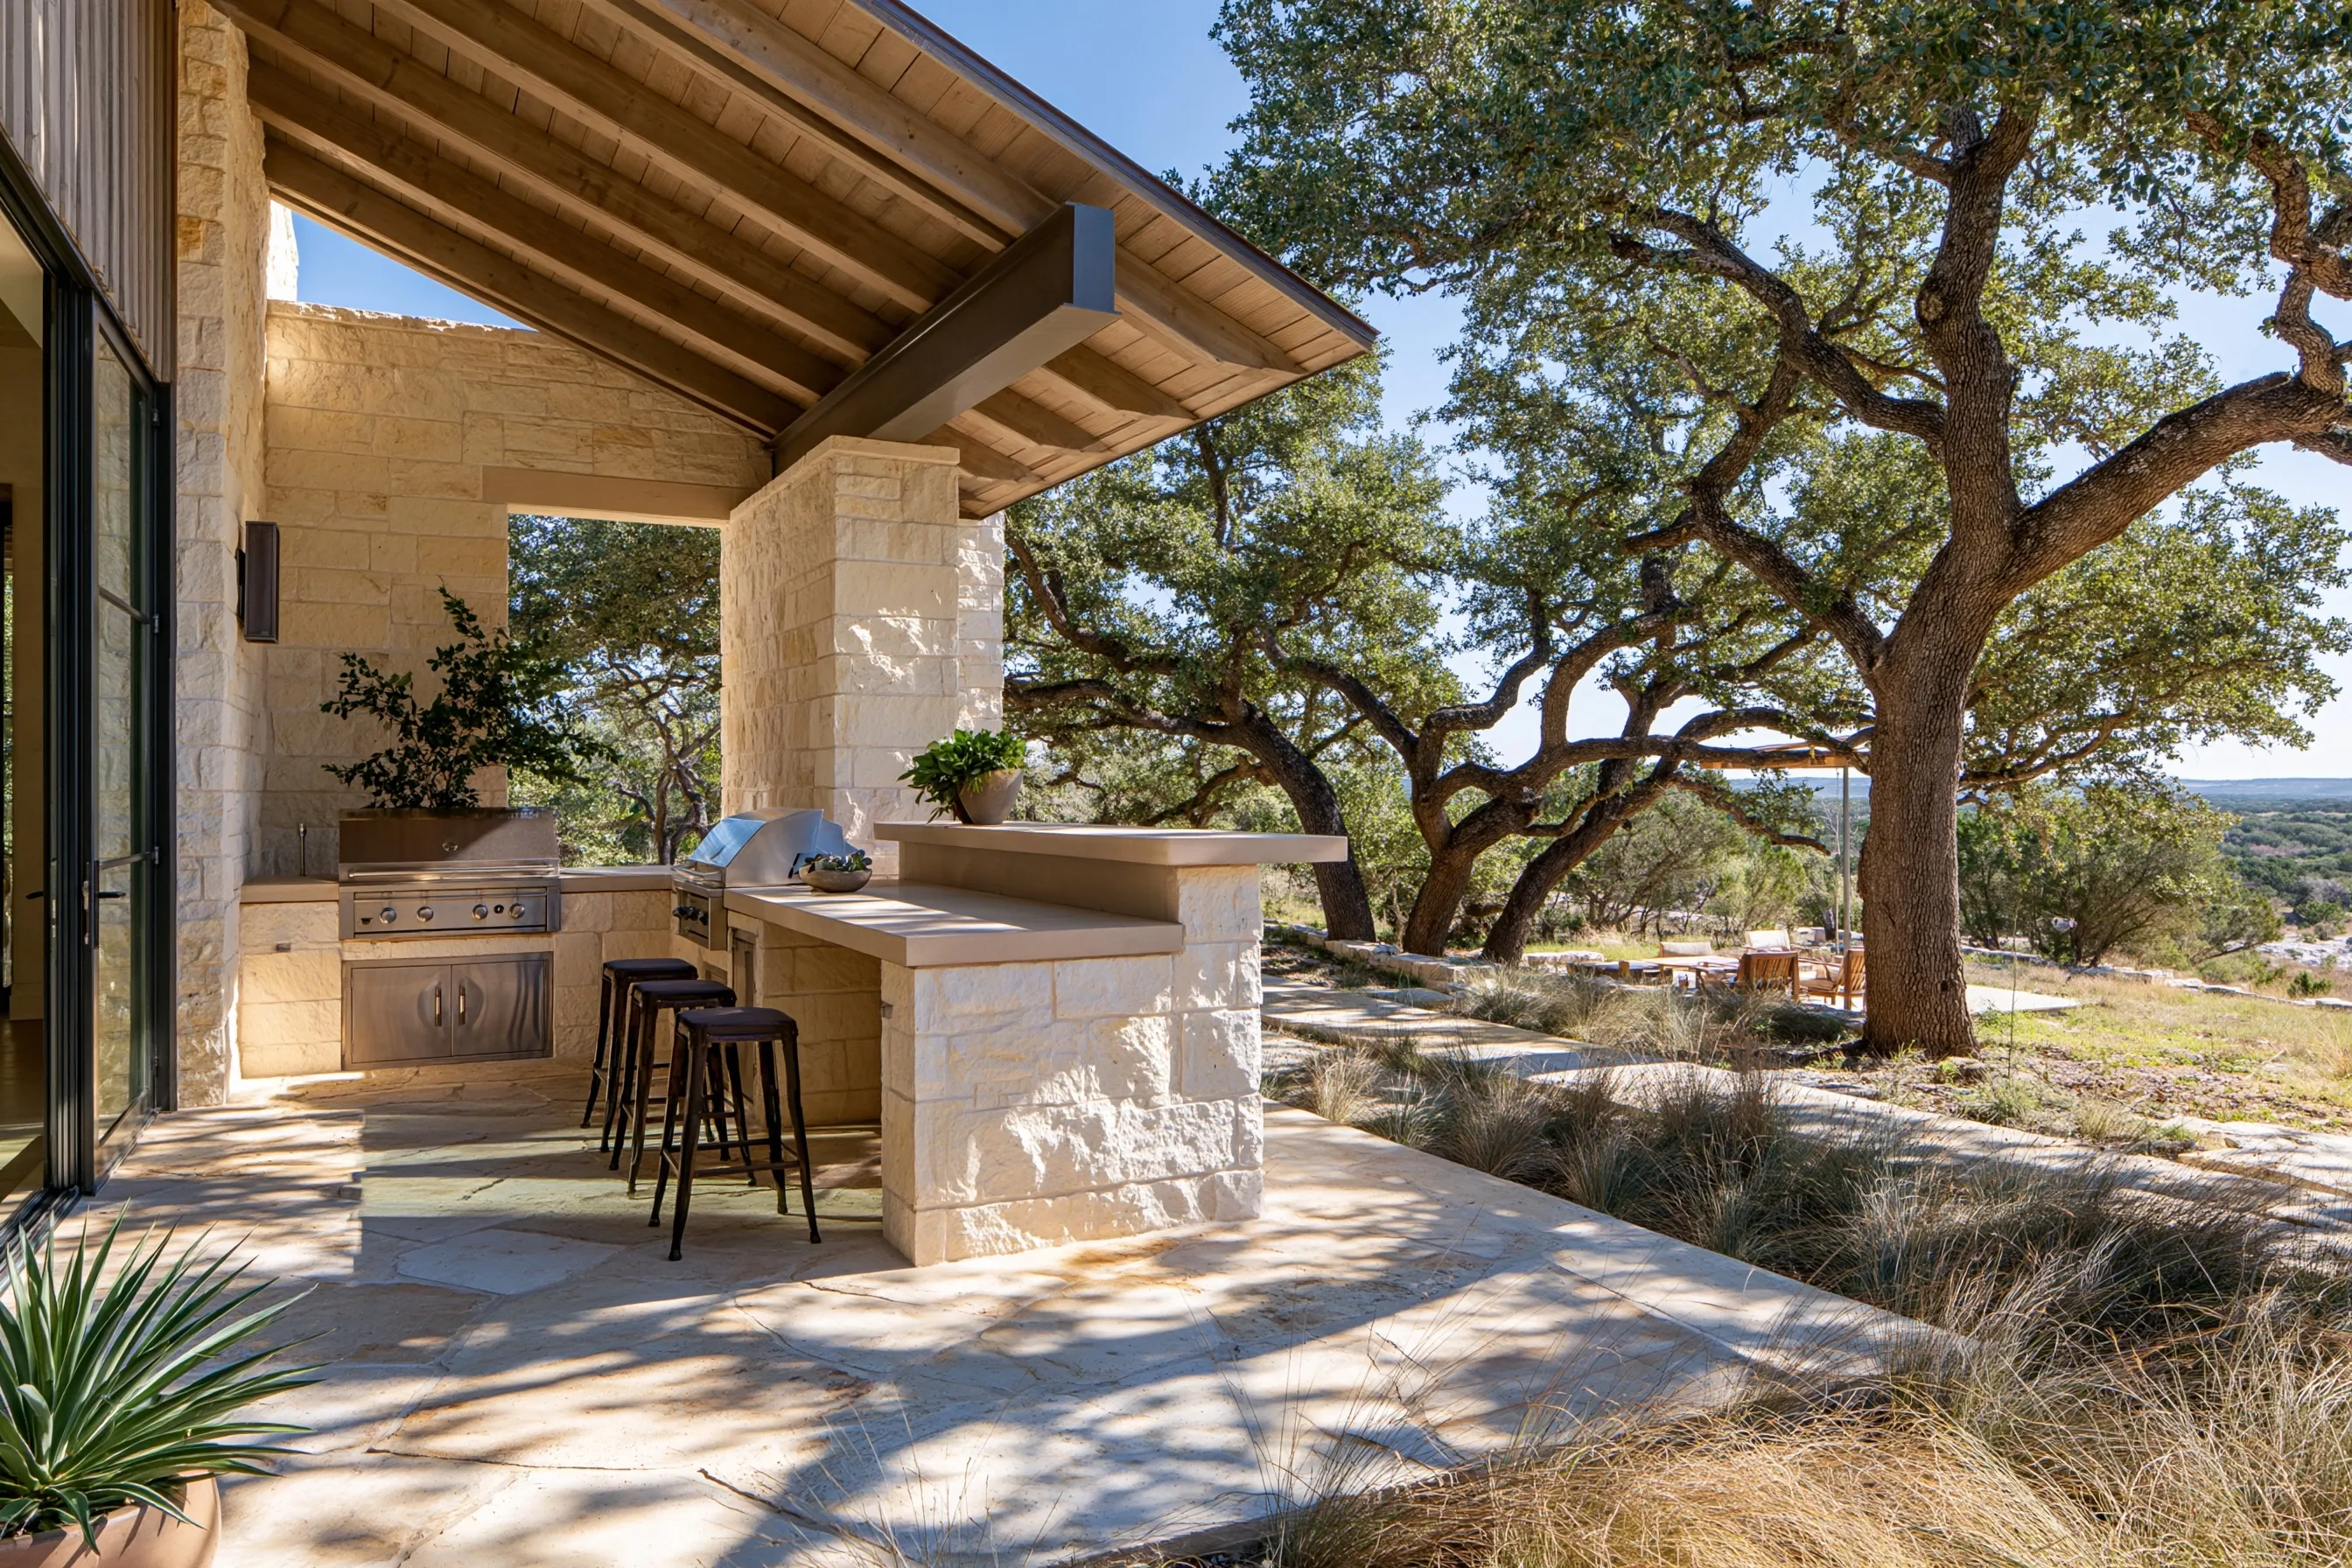
L-shaped limestone outdoor kitchen with two grills, steel doors, a raised bar and three stools under a timber patio roof
Home
2000s house in Round Rock with a covered patio
Original request
Limestone on the outdoor kitchen their builder is putting in
Layout
L-shaped, one run along the stone wall with a grill and doors, the other running out into the patio with a second grill and a raised bar at its end
Stone
Thin limestone, about 115 sq ft, with corner pieces
Not in this cost
The block base, counters, grill, gas and power, all by the kitchen builder
Timeline
About four days, between the base and the counters
Cost
$4,400

Scope of work

Lath and a scratch coat on the builder’s block base, then thin limestone with corner pieces, cut around each door and both grill openings, and the joints finished. The patio is cleaned for the counter crew.

Project overview

In this example, the owners of a 2000s house in Round Rock are having an outdoor kitchen built under their patio cover. Their builder sets the block base, the grill and the counters, and they want the base faced in limestone to go with the house.

Our part sits in the middle of that job. The stone goes on after the base is up and before the counters are set, so each counter can overhang the stone. Every opening is measured from the actual doors and grills before we cut.

The goal

A limestone island and bar that look built in with the house, ready for their counters.

Process

  1. Before work Limestone chosen from samples, door and grill sizes taken from the builder’s order.
  2. Day one Lath and scratch coat on the block base.
  3. Days two and three Limestone set, cut around every door and both grill openings.
  4. Day four Joints finished and the patio cleaned for the counter crew.

Planning right

  • Stone goes on before the counters, not after.
  • Measure each opening from the real doors and grills, not from a drawing.
  • Leave the vent openings in the base clear.
  • Gas and power stay with the kitchen builder.

Get a free quoteMore about outdoor kitchen and fireplace stone
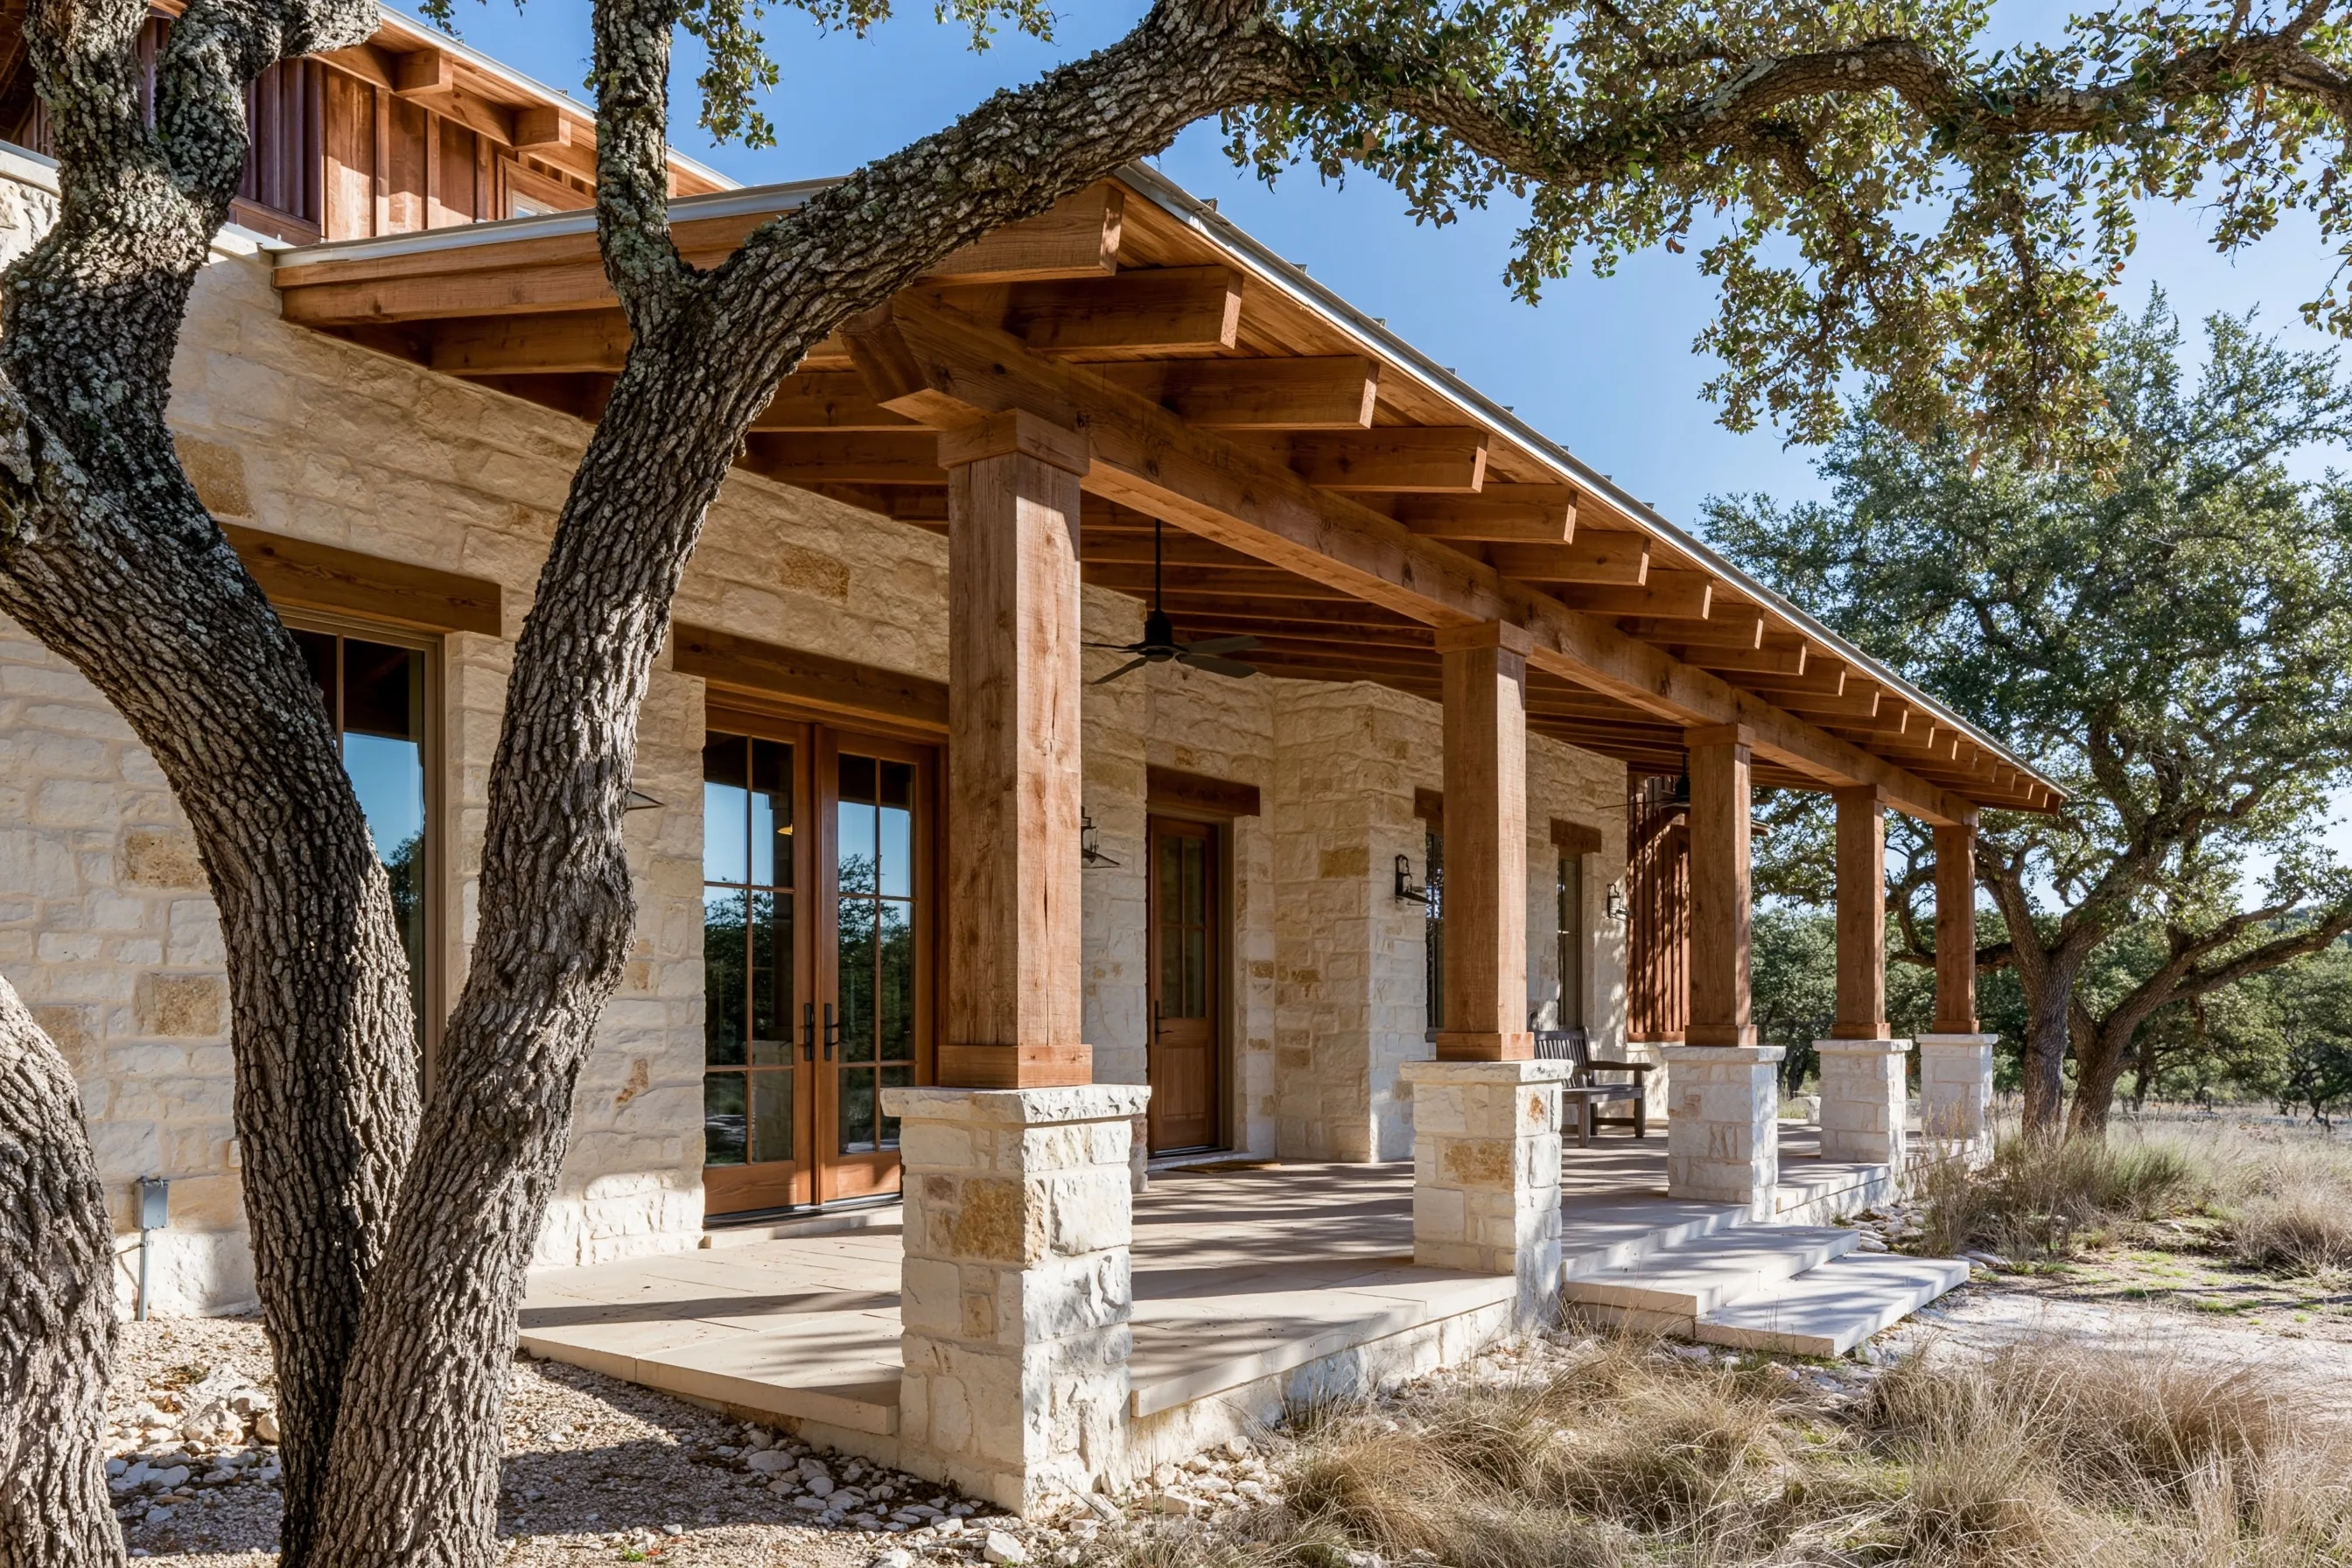
Limestone bases on five porch posts

Example project

Heavy cedar porch posts standing on short limestone bases with caps along the porch of a single-story limestone house
Home
2000s ranch house in Georgetown
Original request
Stone at the foot of the cedar porch posts, where rain splash keeps the wood wet and gray
Porch
Five heavy cedar posts along the front porch, kept as they are
Stone
Short limestone bases about 3 ft tall on all five posts, about 120 sq ft, matching the limestone walls
Caps
Flat limestone caps that slope away from the wood
Timeline
About a week
Cost
$4,300

Scope of work

Each post checked for rot at its foot. A short frame built around the base of each post, backing and lath, limestone on the five bases to match the walls, and sloped caps with a sealed gap at the wood. The posts that hold up the roof are not changed.

Project overview

In this example, the owners of a 2000s ranch house in Georgetown have a limestone house with five cedar posts along the front porch. Rain splash keeps the bottom of each post wet and gray, and they want stone bases there.

The posts carry the porch roof, so they stay. We build a short box around the foot of each one, face it in limestone and top it with a cap that throws water away from the wood.

The goal

Stone bases that protect each porch post and match the house walls.

Process

  1. Before work Foot of each post checked for rot, limestone and caps chosen.
  2. Days one and two Short frames built around the posts, backing and lath fixed.
  3. Days three to five Limestone set on the five bases.
  4. Last day Caps set with a slope away from the posts, joints finished.

Planning right

  • We check each post for rot before it gets covered.
  • A cap that slopes away from the post keeps water off the wood.
  • A small caulked gap between the cap and the post lets the wood move.
  • If the house is in a Georgetown historic overlay, we check with the city before we change the porch.

Get a free quoteMore about porch columns and entryways

Mailbox built into a limestone gate pier

Example project

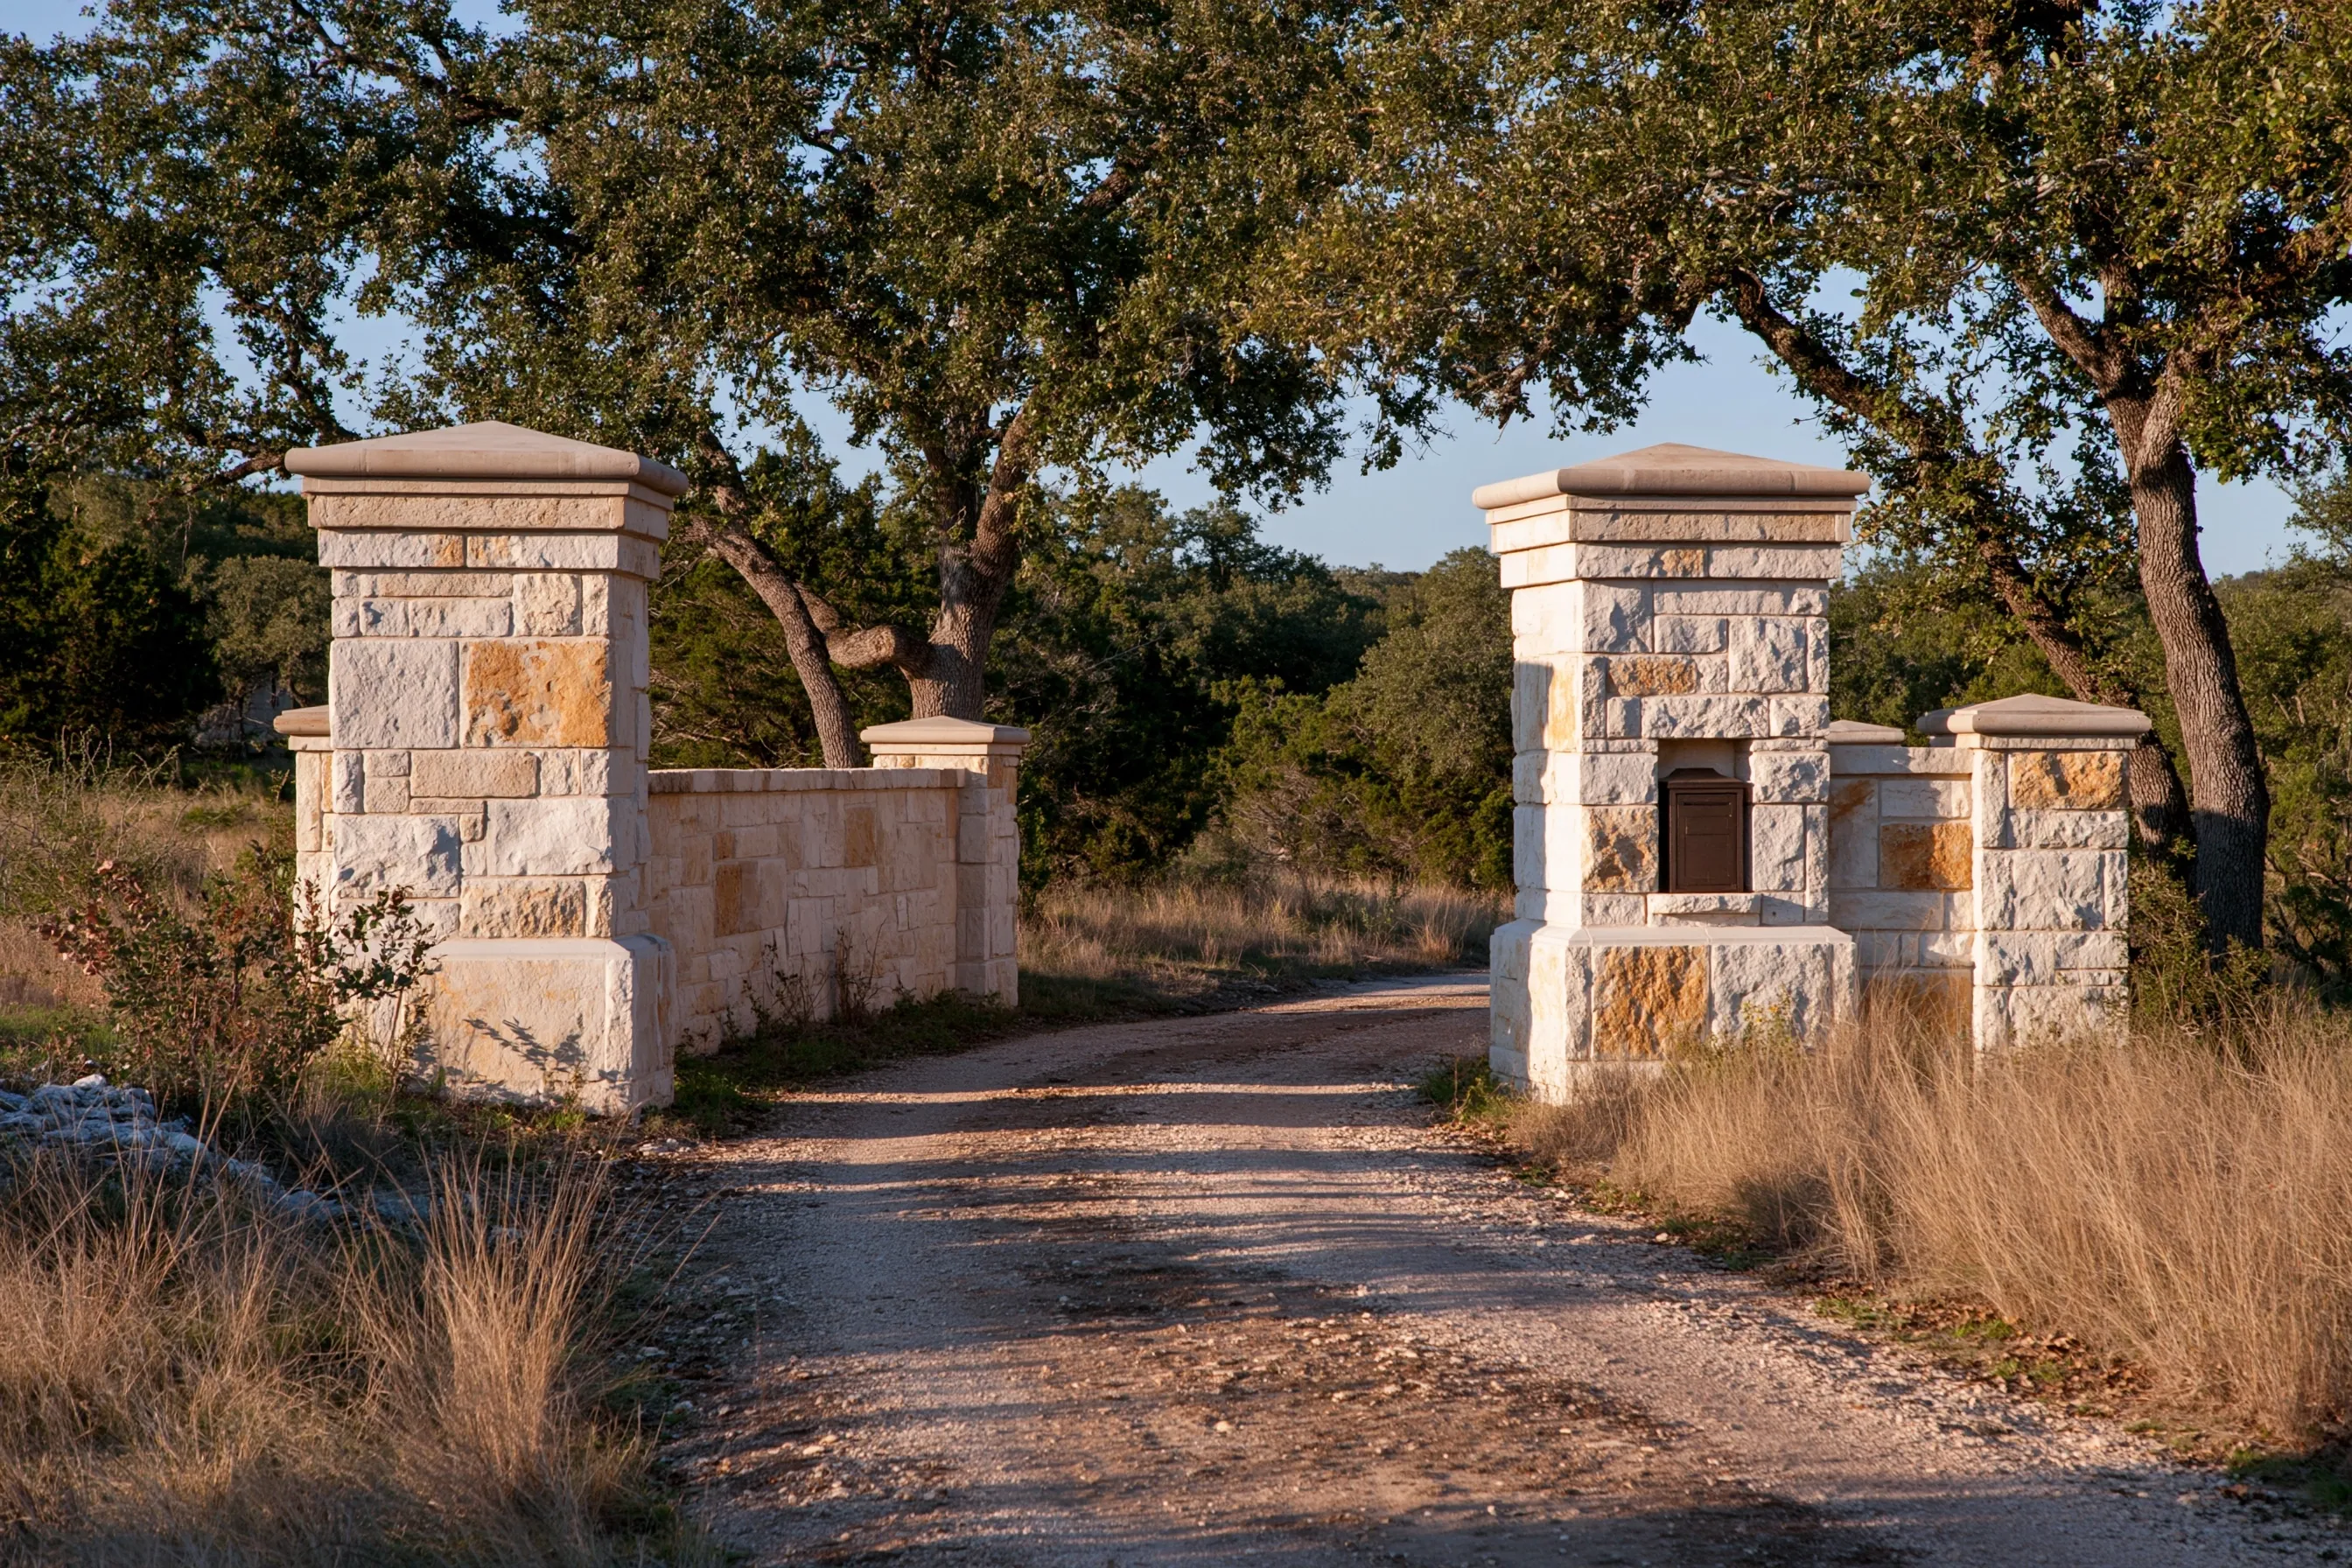
Two capped limestone gate piers with short wing walls at a gravel drive, with a mailbox built into the right pier
Home
2000s house in Cedar Park on a large lot, with limestone gate piers at its gravel drive
Original request
Replace the mailbox on a wood post with one built into the gate pier
Work
A new mailbox box set into the face of the right gate pier, with the limestone laid back around it
Base
The pier’s existing footing, no new footing
Timeline
Two days
Cost
$1,350

Scope of work

The old post taken out. The limestone taken off the face of the right pier at mailbox height, an opening cut in the block core with a lintel over it, the new mailbox box set, and the stone laid back around it with a stone sill under the door. The other pier and the wing walls stay as they are.

Project overview

In this example, the owners of a 2000s house in Cedar Park have two limestone gate piers with short wing walls at the end of their gravel drive, and an old mailbox on a wood post beside them. They want the mailbox built into the right pier.

The pier already sits on a sound footing, so nothing new is built under it. We take the stone off its face, open the block core for the box at the height the post office asks for, and lay the same stone back around it.

The goal

The mailbox becomes part of the gate pier and still suits the mail carrier.

Process

  1. Before work New mailbox chosen and its height and setback checked against post office rules.
  2. Day one Old post out, stone off the pier face, the opening cut and the box set under a lintel.
  3. Day two Limestone laid back around the box, sill set and joints finished.

Planning right

  • Check the mailbox height and distance from the road before the pier is opened.
  • A stone sill under the mailbox door sheds rain away from the joints.
  • Leave room for the mailbox door to open all the way.
  • Put the house number where the carrier can see it.

Get a free quoteMore about garden walls, piers and mailboxes

Block seat wall at the patio faced in limestone

Example project

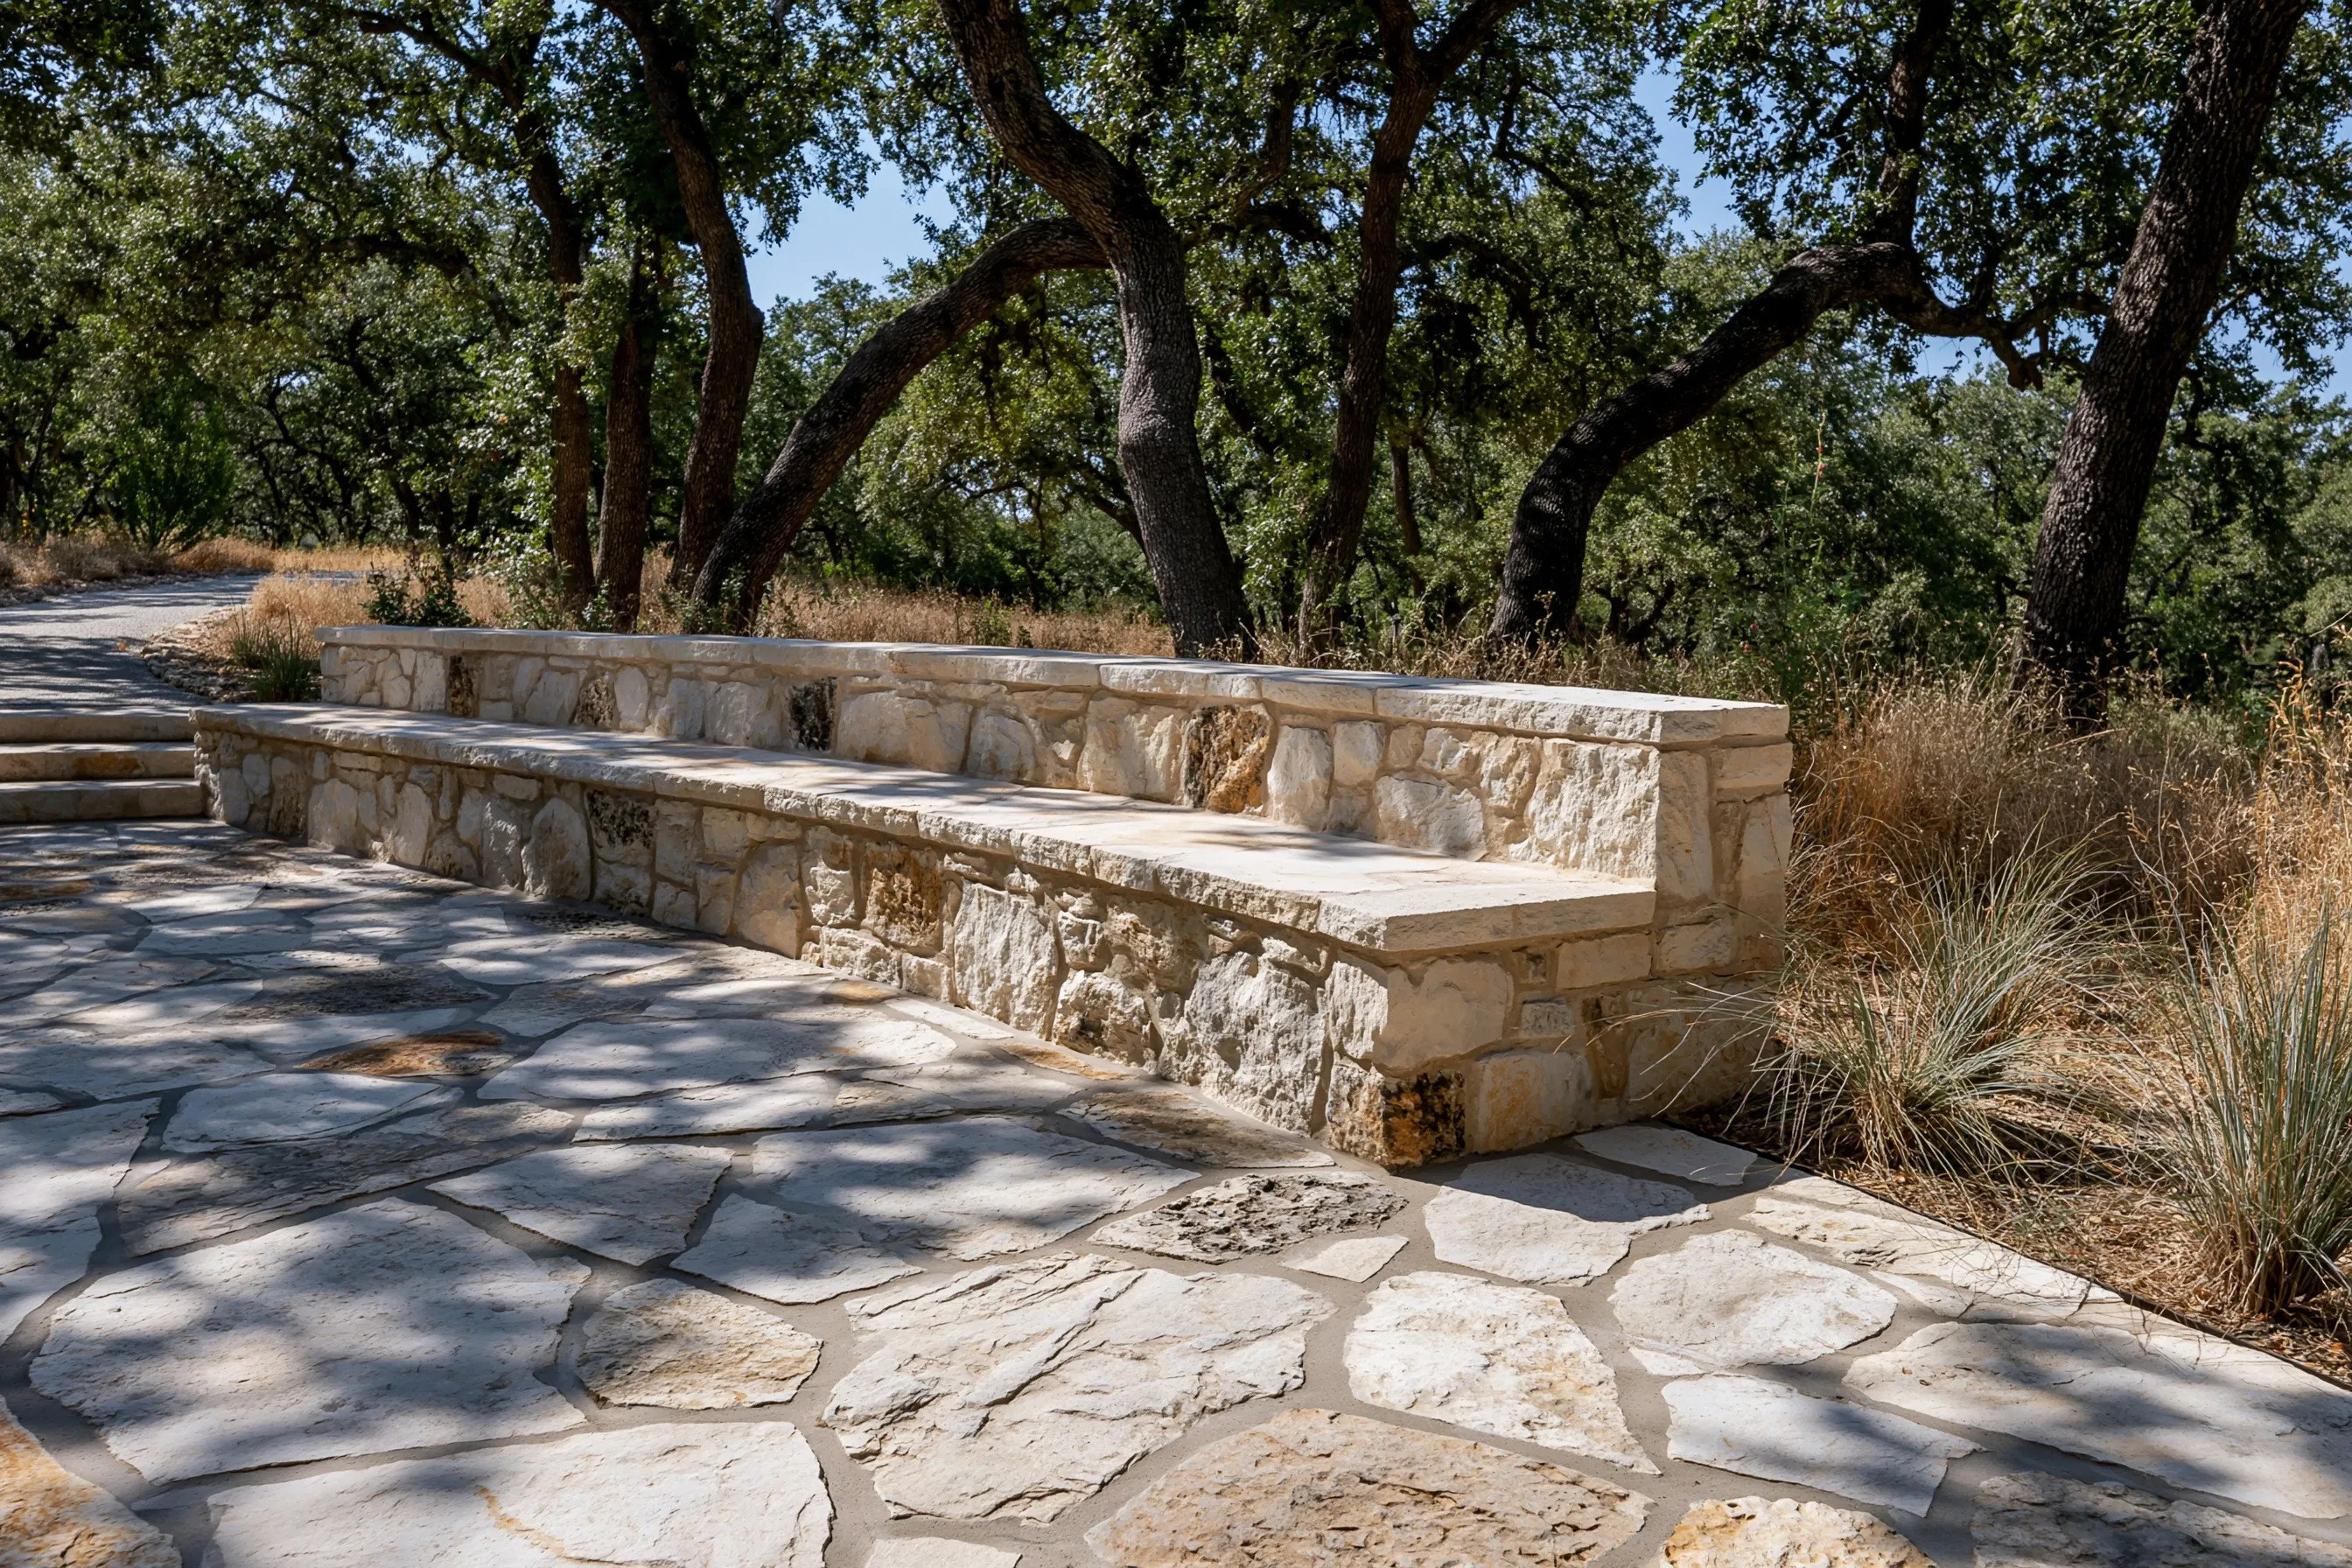
Low limestone seat wall with a taller back wall behind it, both with flat caps, along a flagstone patio under live oaks
Home
2000s house in Hutto with a flagstone back patio
Original request
Make the plain block seat wall along the patio look finished and better to sit on
Wall
Block seat about 18 inches tall with a back wall behind it, about 32 ft long, about 100 sq ft of face
Cap
Wide, flat limestone caps on the seat and along the top of the back wall
Timeline
About a week
Cost
$3,300

Scope of work

Cracks in the block looked for first. The seat front, the back wall above the seat and both ends cleaned, lath and a scratch coat, limestone on every face that shows, and wide flat caps with eased edges and a slight fall, then the patio washed down.

Project overview

In this example, the owners of a 2000s house in Hutto have a plain block seat along the edge of the back patio, with a taller back wall behind it, both built with the patio. Guests sit on it, and the bare block looks unfinished.

We face the seat, the back wall and the ends in limestone, and top both with wide flat caps. The seat caps fall slightly toward the patio, so rain runs off instead of sitting where people sit.

The goal

A patio wall that looks finished and works as a seat.

Process

  1. Before work Wall checked for cracks, limestone and caps chosen.
  2. Days one and two Block faces scrubbed, then lath and a scratch coat on the seat, back wall and ends.
  3. Days three to five Limestone set on every face that shows.
  4. Last day Caps set on the seat and the back wall, joints finished and the patio washed down.

Planning right

  • We only face a sound wall. Building a new one is a separate job.
  • Cap stones should be wide and flat enough to sit on.
  • Easing the cap edges makes the wall kinder to sit on.
  • A slight fall on the caps stops puddles on the seat.

Get a free quoteMore about garden walls, piers and mailboxes

Siding on a framed chimney replaced with limestone

Example project

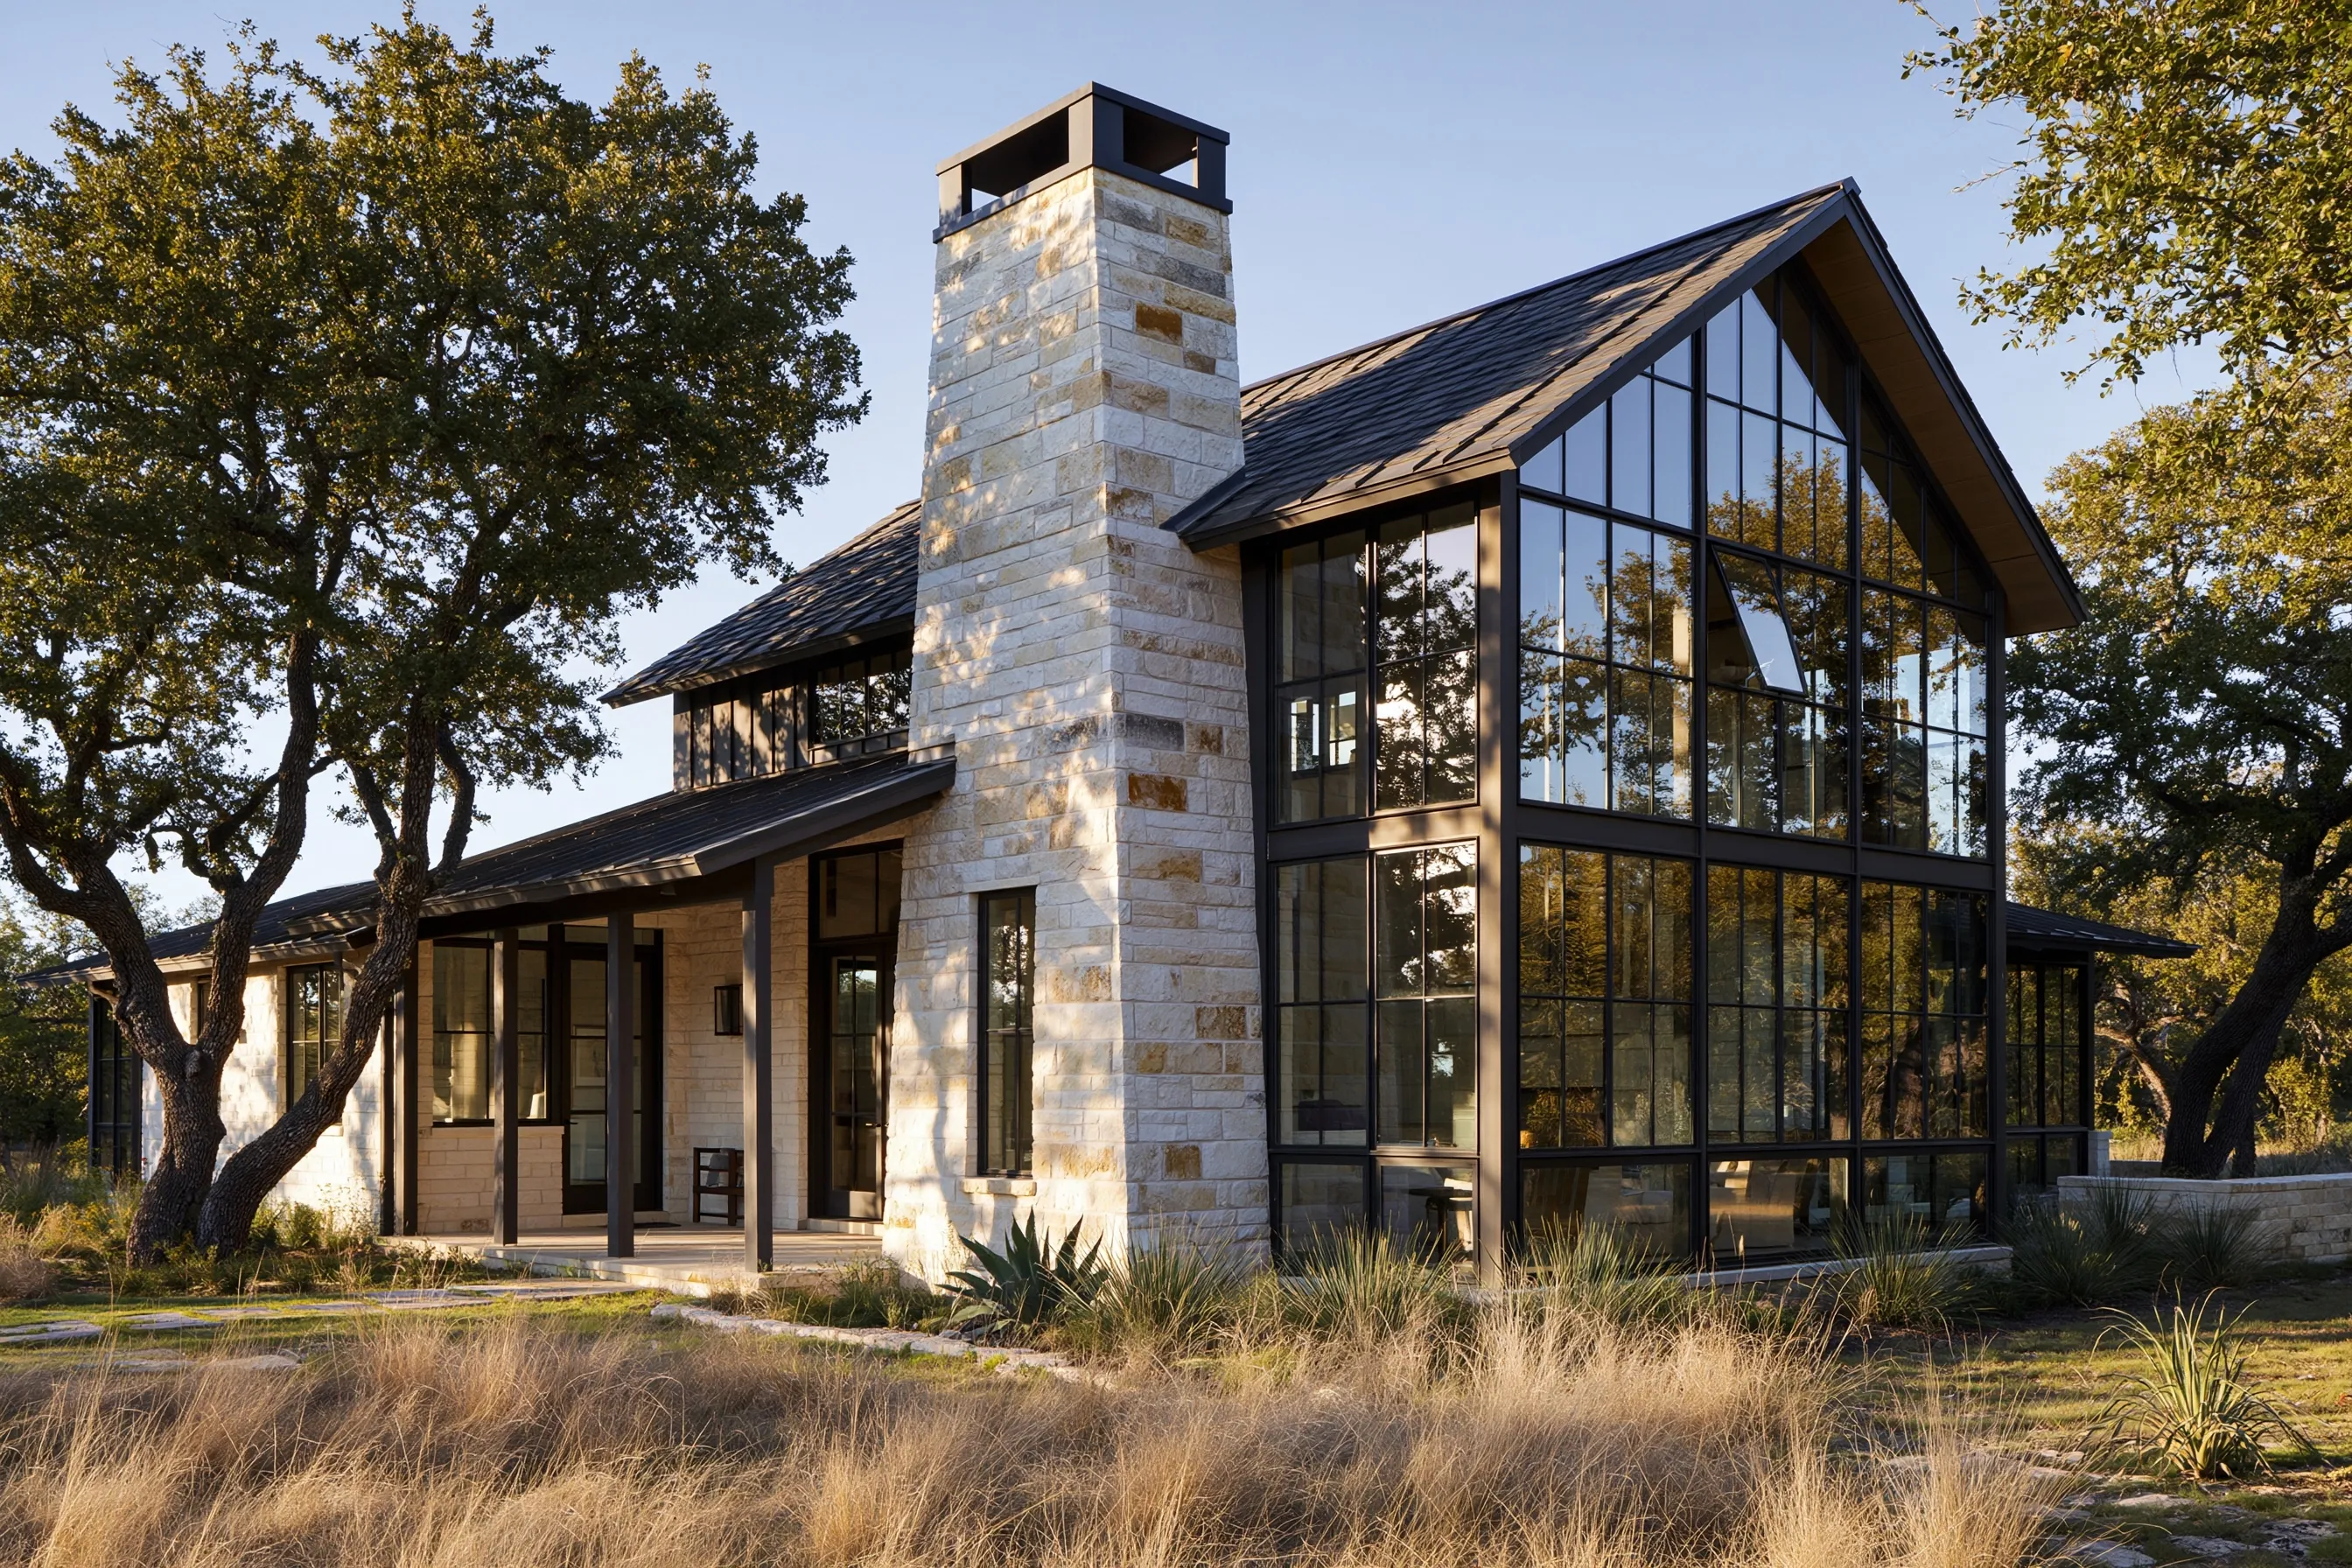
Tall framed chimney clad in limestone rising above the dark metal roof, beside a glass gable wall
Home
1990s house in Round Rock with a tall great room
Original request
Limestone on the chimney instead of split siding
Chimney
Framed chimney on the outside wall, about two stories tall, about 300 sq ft of stone from the ground to the top
Roof
New flashing where the chimney passes the roof, by a roofer, priced separately
Kept
The flue and the chimney cap
Timeline
About two and a half weeks
Cost
$9,700

Scope of work

Scaffold set up. The siding taken off the chimney, the sheathing checked, a water barrier, lath and a scratch coat, then limestone with corner pieces on all sides up to the top. The flue and cap stay, and the roof flashing is the roofer’s part.

Project overview

In this example, the owners of a 1990s house in Round Rock have a tall framed chimney beside their great room, clad in siding. The siding on the chimney has split, and they want limestone there instead.

We take the siding off and check the framing and sheathing before new layers go on. A roofer redoes the flashing where the chimney passes the roof, so the stone and the flashing are planned together.

The goal

Limestone on the chimney over a dry wall, with sound flashing where it meets the roof.

Process

  1. Before work Scaffold up and a roofer booked for the flashing.
  2. Days one and two Siding off, sheathing checked, water barrier and lath on.
  3. Days three to eleven Limestone set from the ground up, corner pieces on every edge.
  4. Last days Roofer fits the new flashing, joints finished and the scaffold comes down.

Planning right

  • Look at the chimney from every side. The back and sides count as much as the front.
  • Plan the roof flashing with the roofer before the stone goes on.
  • Flue and cap work is a separate job.
  • We choose where the scaffold stands so the beds are not crushed.

Get a free quoteMore about exterior chimney cladding

Manufactured ledgestone on a front bump-out

Example project

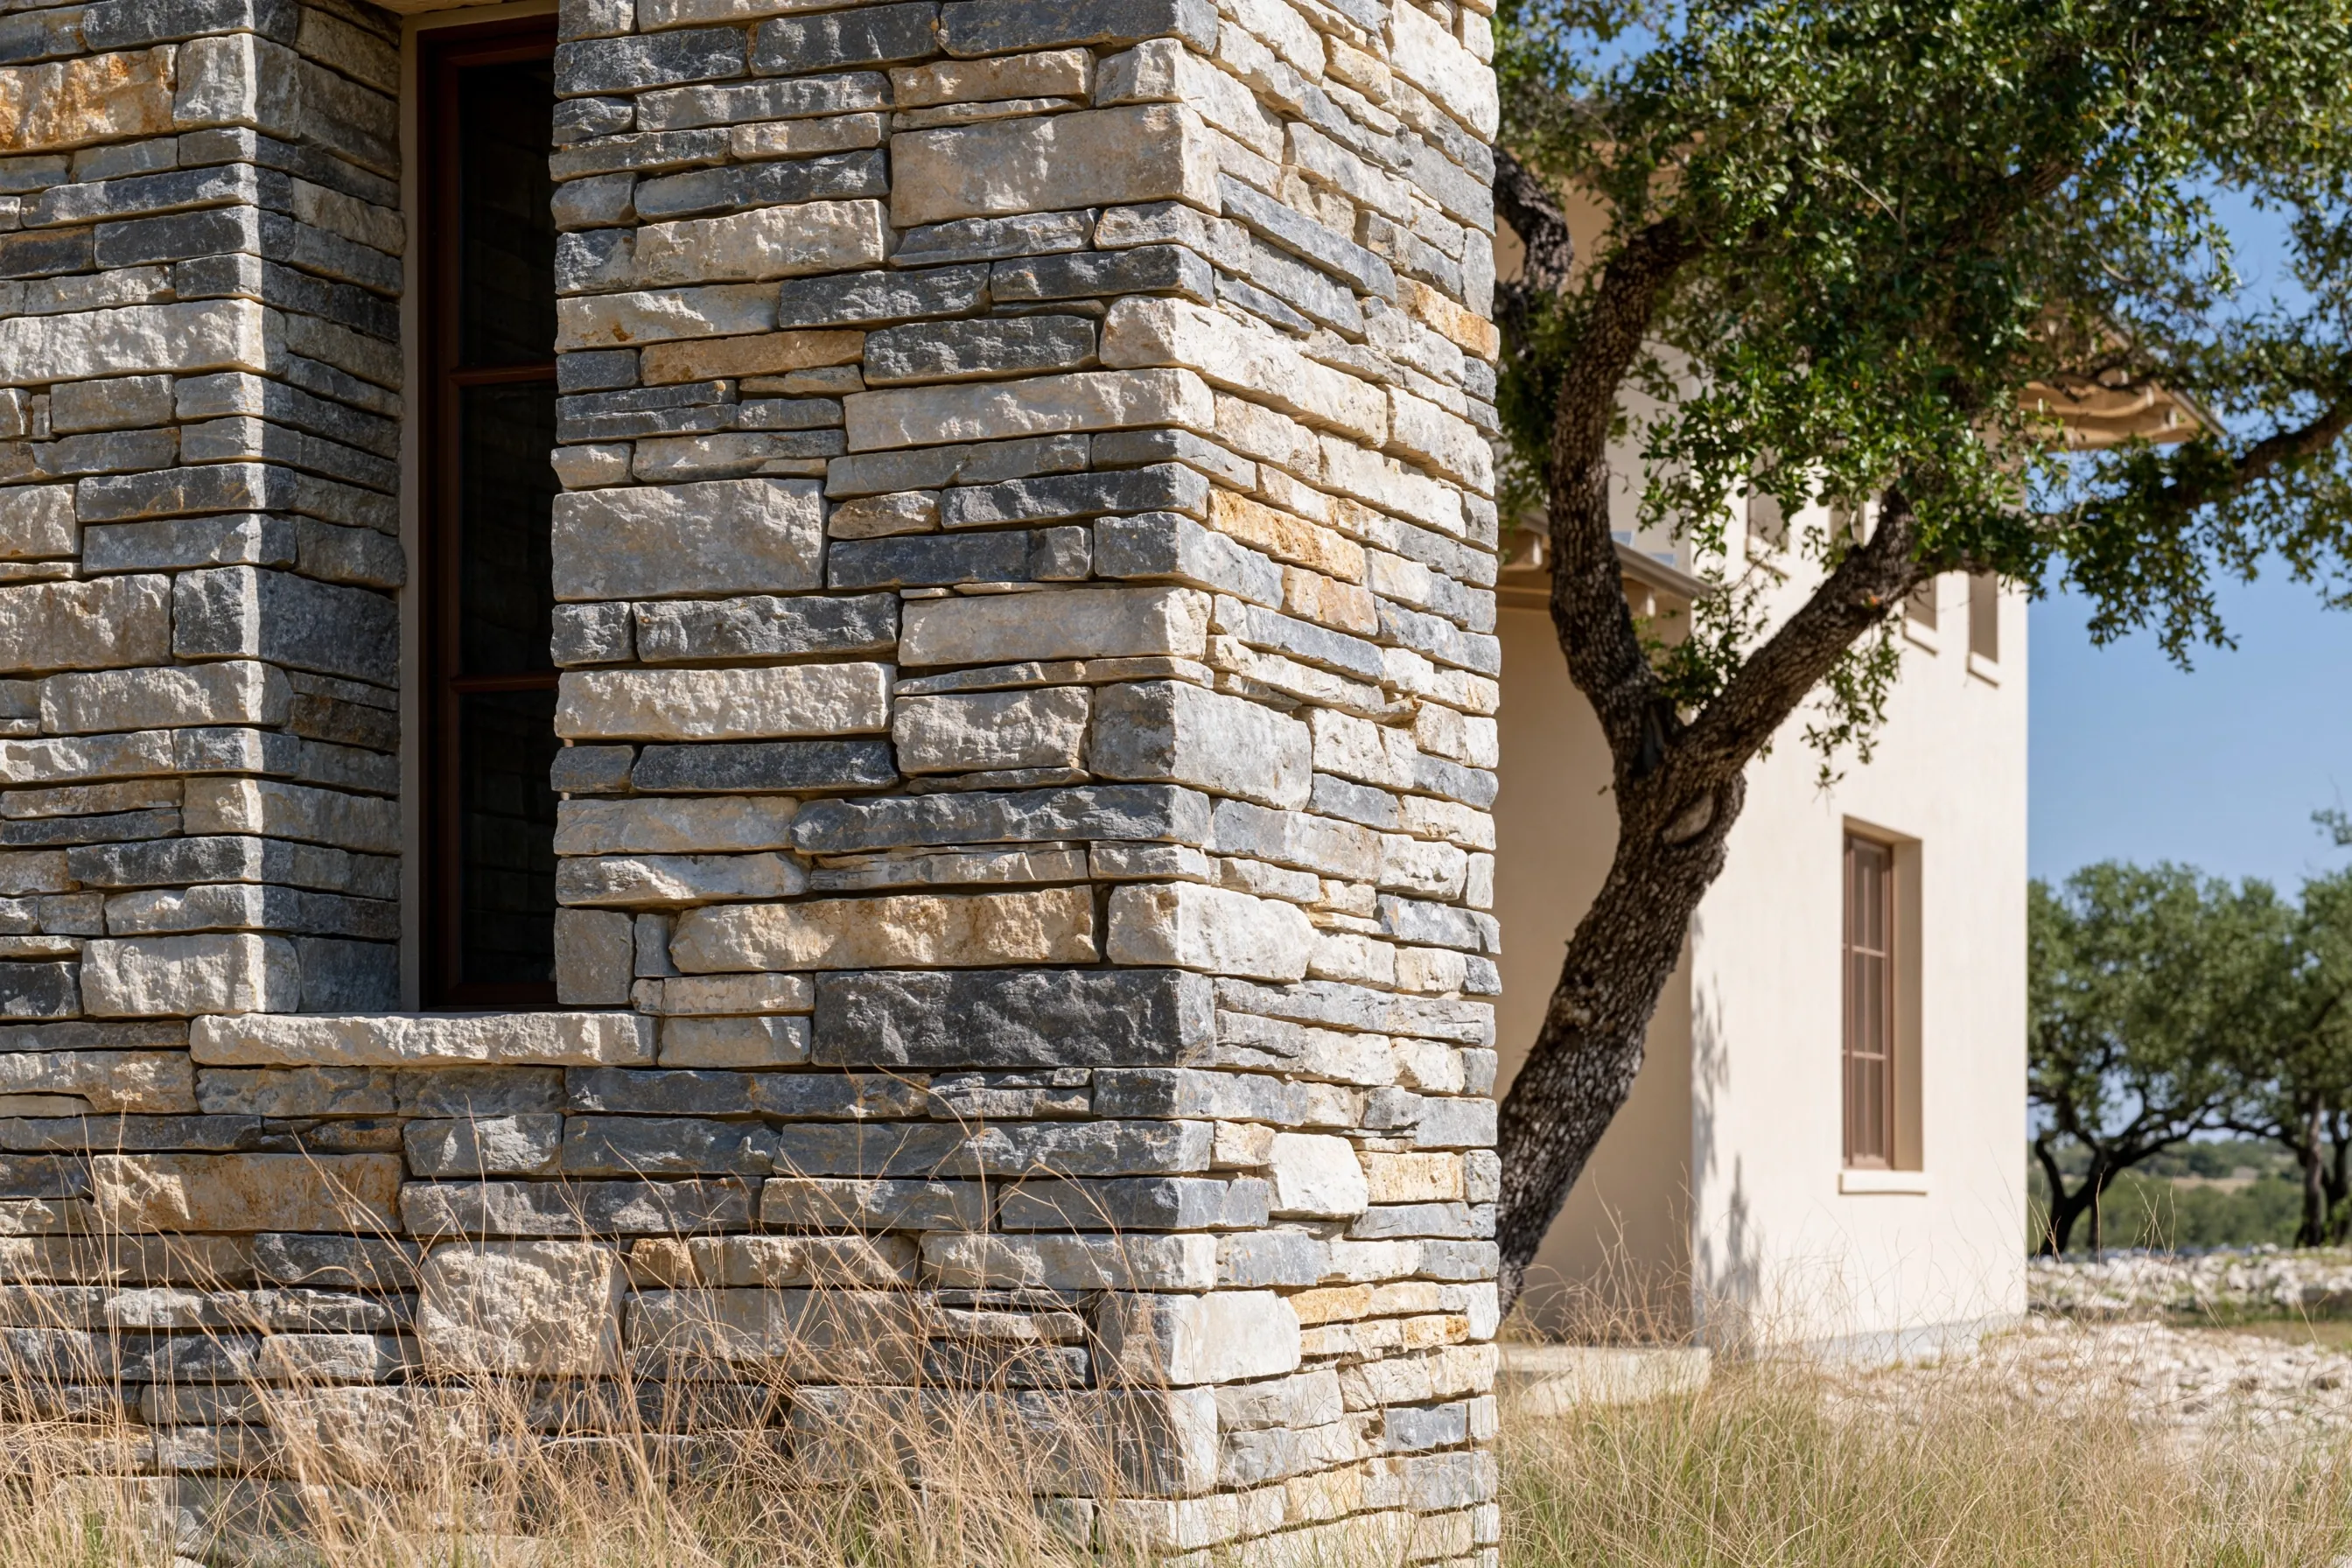
Close view of ledgestone turning an outside corner beside a deep window with a stone sill, with stucco beyond
Home
2010s house in Round Rock
Original request
Stone on the front bump-out between the garage and the door
Wall
Bump-out with two outside corners and a window, about 95 sq ft
Stone
Manufactured ledgestone with the maker’s corner pieces, tight joints
Timeline
Three days
Cost
$3,100

Scope of work

A water barrier, metal lath and a scratch coat on the bump-out, the corner pieces set first, then the flat stones worked in toward the middle, the stone turned into the window opening with a stone sill under it, and trim along the base.

Project overview

In this example, the owners of a 2010s house in Round Rock have a front bump-out between the garage and the door, painted the same color as the rest of the house. They want it in stone so the front has one strong feature.

The bump-out has two outside corners, and those show more than anything else. We use the maker’s corner pieces there, so each corner looks like one stone turning the edge, and keep the joints tight for the ledgestone look.

The goal

The bump-out becomes the one clear focus of the front, with crisp stone corners.

Process

  1. Before work Ledgestone and corner pieces chosen from the maker’s samples.
  2. Day one The bump-out wrapped, lathed and given its scratch coat.
  3. Day two Corners set first, then the flat stones worked in from them.
  4. Day three Stone sill under the window, trim at the base, and the beds cleaned.

Planning right

  • Set the corners first and work in from them.
  • Corner pieces cost more than flats but make the stone look solid.
  • Keep the stone above the drive and the beds at the base.
  • Order a few extra pieces from the same batch for repairs later.

Get a free quoteMore about manufactured stone veneer

Painted stucco office front refaced in limestone

Example project

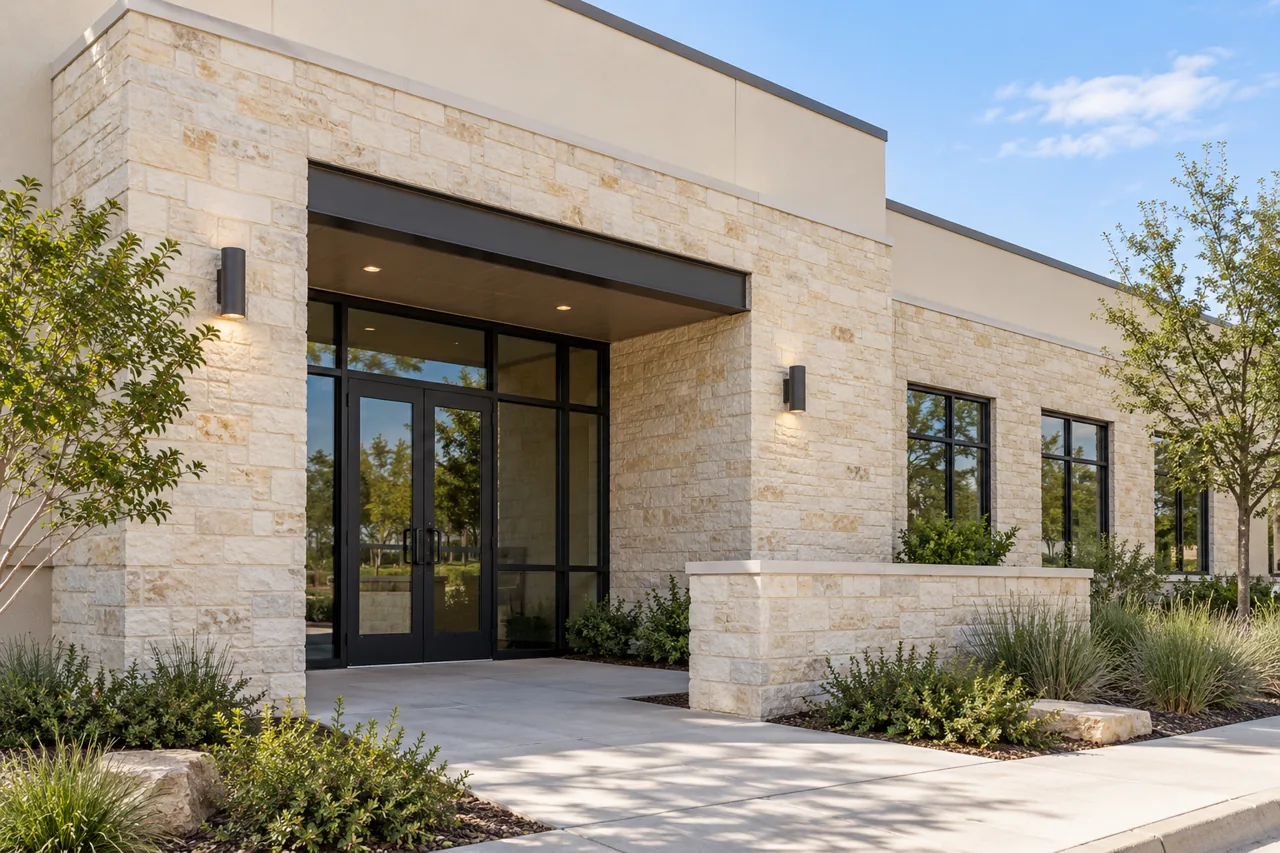
One-story office building faced in pale limestone, with a recessed glass entrance under a dark canopy and a low stone planter wall
Building
1990s one-story office building in Round Rock
Original request
Limestone across the front and around the entrance in place of painted stucco
Area
Front wall below the parapet, entrance surround and a low planter wall, about 1,000 sq ft
Access
Scaffold for the upper wall, part of the cost
Timeline
About four weeks, in sections
Cost
$31,000

Scope of work

Stucco taken off in sections, a water barrier and backing, flashing over the windows and at the entrance canopy, limestone with corner pieces across the front and around the entrance, and the planter wall faced and capped. The stucco parapet above stays. Scaffold for the upper wall is included.

Project overview

In this example, the owner of a 1990s office building in Round Rock wants the worn stucco front replaced with limestone. The offices stay open during the work.

The stucco comes off one section at a time, so the entrance can always be used. Each section gets a water barrier and backing, with flashing over the windows and at the canopy, before the stone goes on. The low planter wall by the walk gets the same stone and a flat cap.

The goal

A limestone front over a dry wall, finished while the building stays open.

Process

  1. Before work Stone approved from a sample board, then a safe route and working hours settled with the owner.
  2. Week one Scaffold up, stucco off the first sections, water barrier and lath on.
  3. Weeks two and three Limestone set section by section, the entrance surround last.
  4. Week four Planter wall faced and capped, joints finished, scaffold down.

Planning right

  • Working in sections keeps the doors open.
  • Agree a safe route for staff and visitors before work starts.
  • Flash over every window and at the canopy before stone goes on.
  • Decide where signs and lights go before the stone is set.

Get a free quoteMore about commercial stone veneer

Limestone band along the bottom of a stucco front

Example project

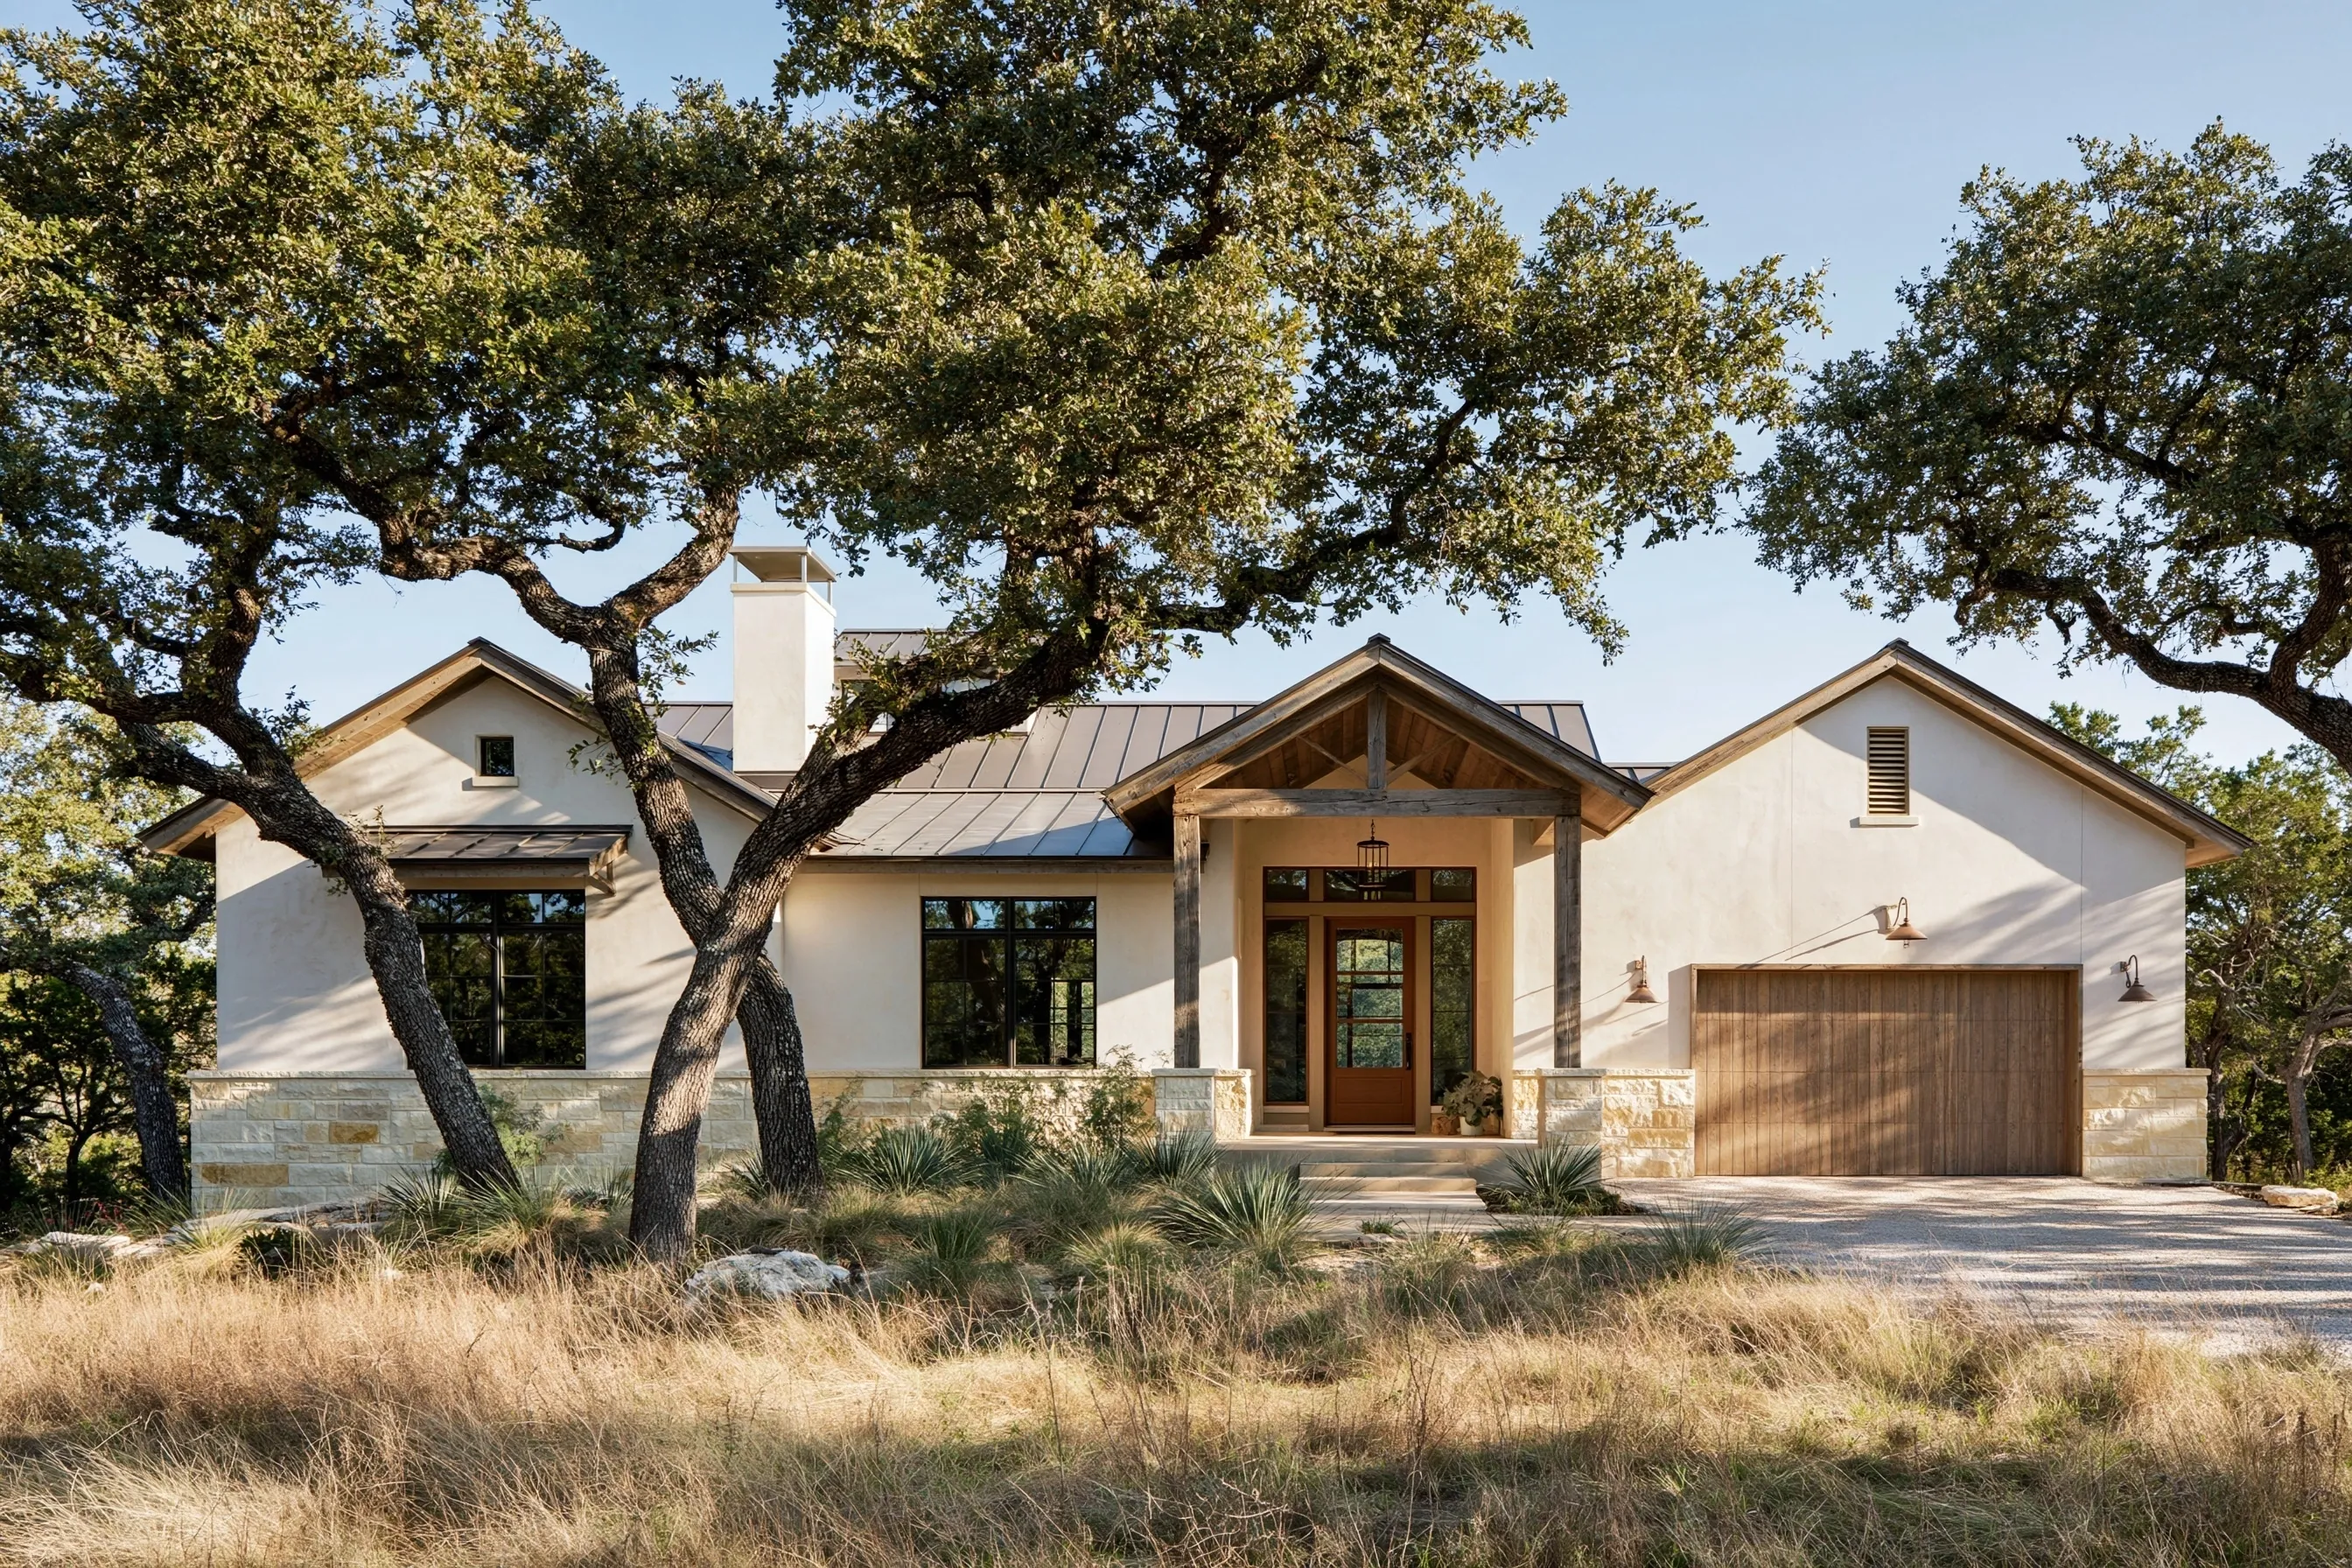
Limestone wainscot band below stucco across the front of a Texas ranch house
Home
1980s ranch house in Round Rock
Original request
Stone along the bottom of the front, where the stucco is chipped and stained
Band
About 3 ft tall across the front, about 150 sq ft
Top edge
Limestone sill along the top of the band
Kept
The stucco above the band
Timeline
About a week
Cost
$3,800

Scope of work

The lower stucco cut back along a straight line, a water barrier and lath on the lower wall, limestone across the front with corner pieces at each end, and a sill along the top with the joint to the stucco sealed.

Project overview

In this example, the owners of a 1980s ranch house in Round Rock have stucco across the front that is chipped and stained along the bottom, where sprinklers and the mower hit it. They want a limestone band there and the rest of the stucco kept.

We cut the stucco back along a straight line about 3 ft up, prepare the lower wall and set the stone. A sill along the top of the band sheds water away from the joint with the stucco above.

The goal

A tough stone base across the front, with the stucco above left as it is.

Process

  1. Before work Band height chosen to line up with the window sills.
  2. Days one and two Stucco cut back and the lower wall prepared.
  3. Days three to five Limestone set across the front, corner pieces at each end.
  4. Last day Sill set along the top and the joint with the stucco sealed.

Planning right

  • Line the top of the band up with something on the house, like the window sills.
  • A sill on top keeps water out of the joint with the stucco.
  • Turn the stone around each corner so the band does not stop on a flat edge.
  • Point the sprinklers away from the new stone.

Get a free quoteMore about stone facades and wainscoting

Natural limestone front during a remodel

Example project

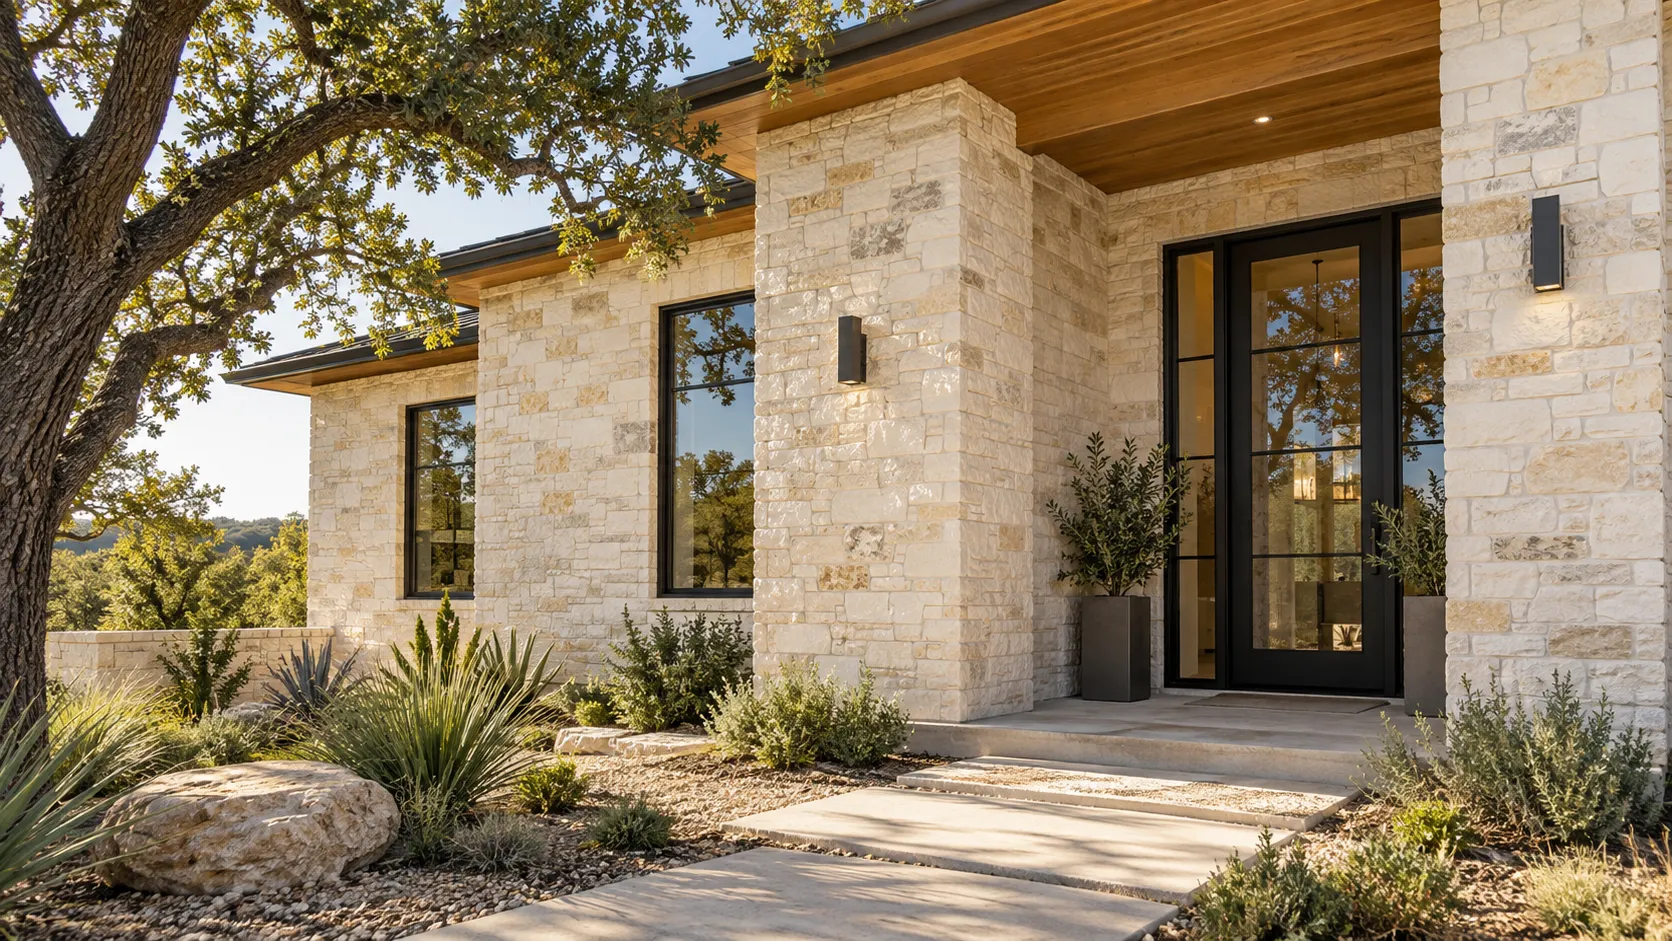
House front faced in pale natural limestone, with tall black windows, a glass front door and a wood soffit over the entry
Home
2000s house in Round Rock, front being remodeled
Original request
Natural limestone on the front instead of siding, while the walls are open
Area
Front walls and the walls around the new covered entry, about 600 sq ft
Stone
Natural thin limestone in mixed sizes, with corner pieces
Behind the stone
Wrap, window flashing, lath and a base coat of mortar
Timeline
About two and a half weeks of stone work
Cost
$19,500

Scope of work

A sample panel first. Then a water barrier, flashing at the new windows and door, lath and a scratch coat over the remodeled walls, natural thin limestone with corner pieces across the front and around the entry, brushed joints and trim at the soffit.

Project overview

In this example, the owners of a 2000s house in Round Rock are remodeling the front, with a new covered entry and taller windows. With the walls already opened up, they want the front in natural limestone rather than siding.

Natural stone costs more than manufactured stone and its color varies more, so we start with a sample panel set with the chosen mortar. Thin limestone is light enough to be fixed to the wall without a new footing, while the cut edges and corner pieces look like full stone.

The goal

The front ends up in natural limestone that looks like full stone, over a wall that sheds water.

Process

  1. Before work Sample panel approved while the remodel crew finishes the walls and windows.
  2. Days one to three New windows flashed, the walls wrapped, and the lath and scratch coat put on.
  3. Weeks two and three Limestone set across the front and around the entry, corners on every edge.
  4. Last day Joints brushed, soffit trim fitted and the beds cleaned.

Planning right

  • Approve a sample panel with the real mortar color.
  • Window flashing goes in before the stone.
  • Order all the stone at once so the color stays even.
  • We show you how the stone will finish at the soffit and roof line.

Get a free quoteMore about natural thin stone veneer

Stone panel skirting around a crawl space

Example project

Home
1980s house in Georgetown with a back addition on a raised wood floor
Original request
A solid-looking skirting in place of worn wood lattice
Area
Skirting on the three open sides of the addition, about 47 ft in all and 2 ft tall, about 95 sq ft
Panels
Stone-look panels screwed to a treated frame, with corner pieces
Kept open
Every crawl space vent and the access door
Timeline
Three days
Cost
$2,100

Scope of work

The old lattice taken off, a treated frame fixed along the base of the addition and kept off the soil, stone panels screwed on and cut around each vent and the access door, and corner pieces and top trim fitted.

Project overview

In this example, the owners of a 1980s house in Georgetown have a back addition, about 16 by 15 ft, built on a raised wood floor, with worn lattice around its crawl space. They want something that looks like stone and keeps animals out, without the weight of mortared stone.

Mortarless panels screw to a frame, so they suit a light skirting that has to stop short of the soil. The vents and the access door are framed in first, and the panels go on around them.

The goal

Skirting that looks like stone, closes off the crawl space and keeps it vented.

Process

  1. Before work Vents and the access door marked, panels and corners chosen.
  2. Day one Old lattice off and a treated frame fixed along the base of the addition.
  3. Day two Panels screwed on and cut around each vent and the door.
  4. Day three Corner pieces and top trim fitted, the area cleaned up.

Planning right

  • Keep every crawl space vent open.
  • Leave an access door you can get through.
  • Keep the frame and panels off the soil.
  • Screwed panels can come off if work under the house needs room.

Get a free quoteMore about mortarless stone panels

Request a free stone veneer quote

Tell us what you want faced in stone, roughly how much wall there is, what covers it now and the address. A few photos help. We'll get back to you soon to arrange a visit or with any questions we have. Estimates are free and there's no obligation.

Call (737) 210-7774